Helix servers Configuration
Section responsible for Helix server configuration Configuration->Helix servers configuration.
The individual tabs correspond to the sections in the config.ini Helix file. If the console is connected to more Helix servers, you can select the desired instance from the list.
Basic information:
- Modified values are highlighted in yellow.
- Parameters that have been entered with invalid values are highlighted in red.
- The Refresh all configurations button takes the configuration of all Helix servers.
- The system controls the saving of changes on individual instances.
ODBC source configuration (Helix)

The ODBC source configuration includes connection parameters to the database. The source is automatically configured during console and Helix server installation. If the server on which the database is located has been changed or its address has been changed, the configuration must be edited.
ODBC source configuration (Console)
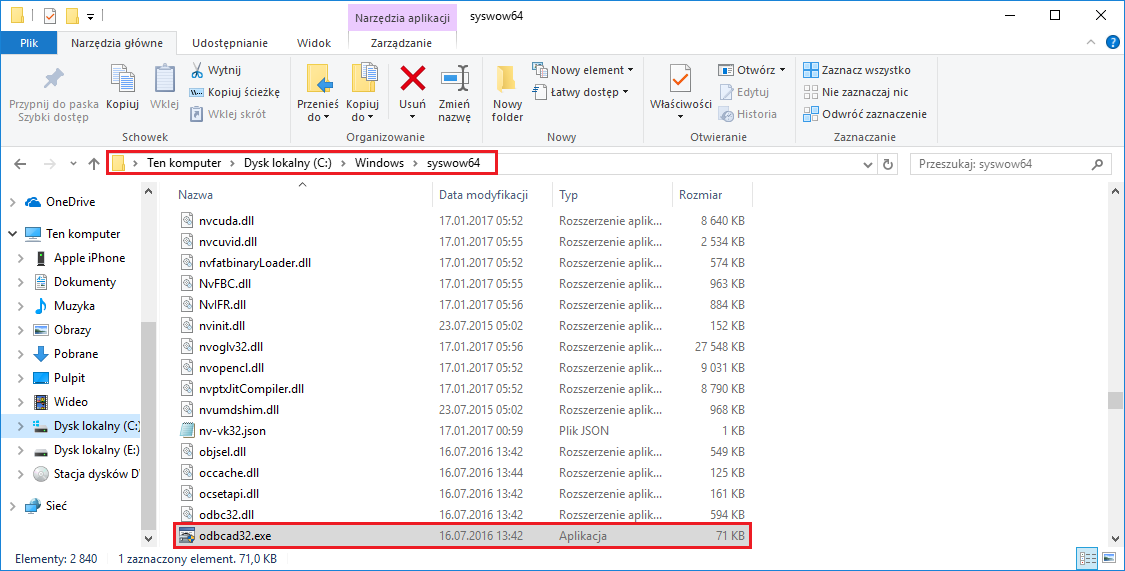
To configure the ODBC source for the console, go to the directory C:\Windows\swow64 and run the file odbcad32.exe.
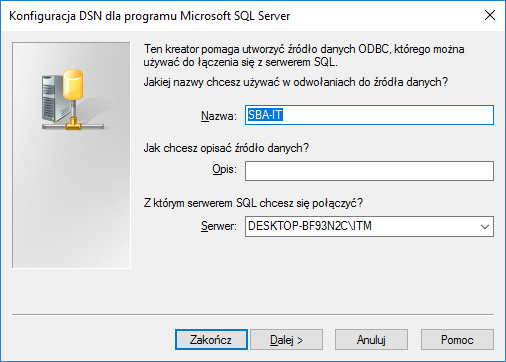
On the System DNS tab, select an existing or add a new data source:

In the next window, enter a name for the connection and select Server.
Then select Authenticate SQL Server using the login ID and password provided by the user.
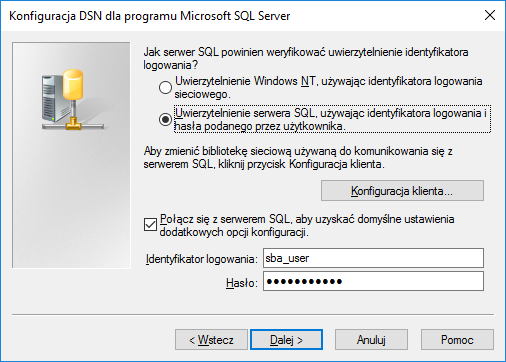
Enter sba_user in the Login field and Sba_U$er123 in the Password field.
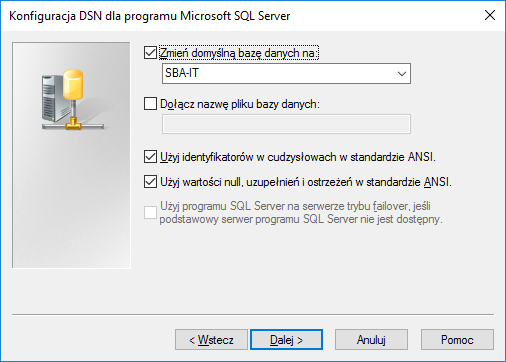
In the next window, set the default database to SBA-IT.
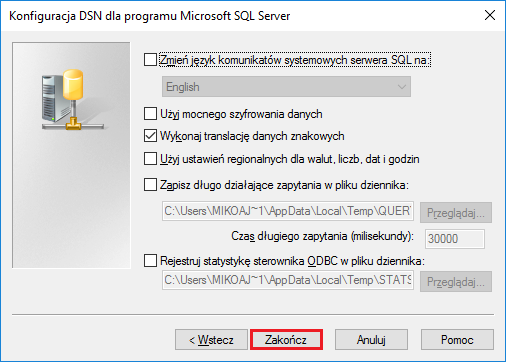
In the next window, click ** Finish**.
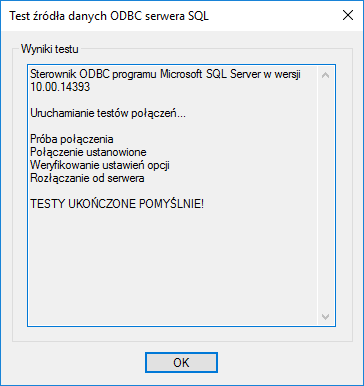
In the new window, select Test data source... to verify the settings
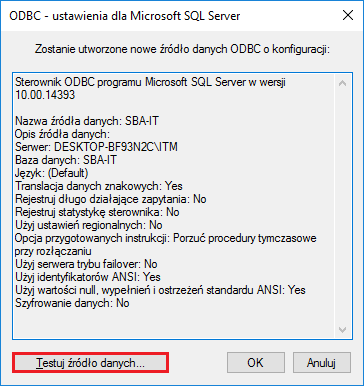
After successfully passing the connection test, you can close both windows by clicking OK.
Database connection (Server)
The field ListenPort specifies the port on which the Helix server operates.
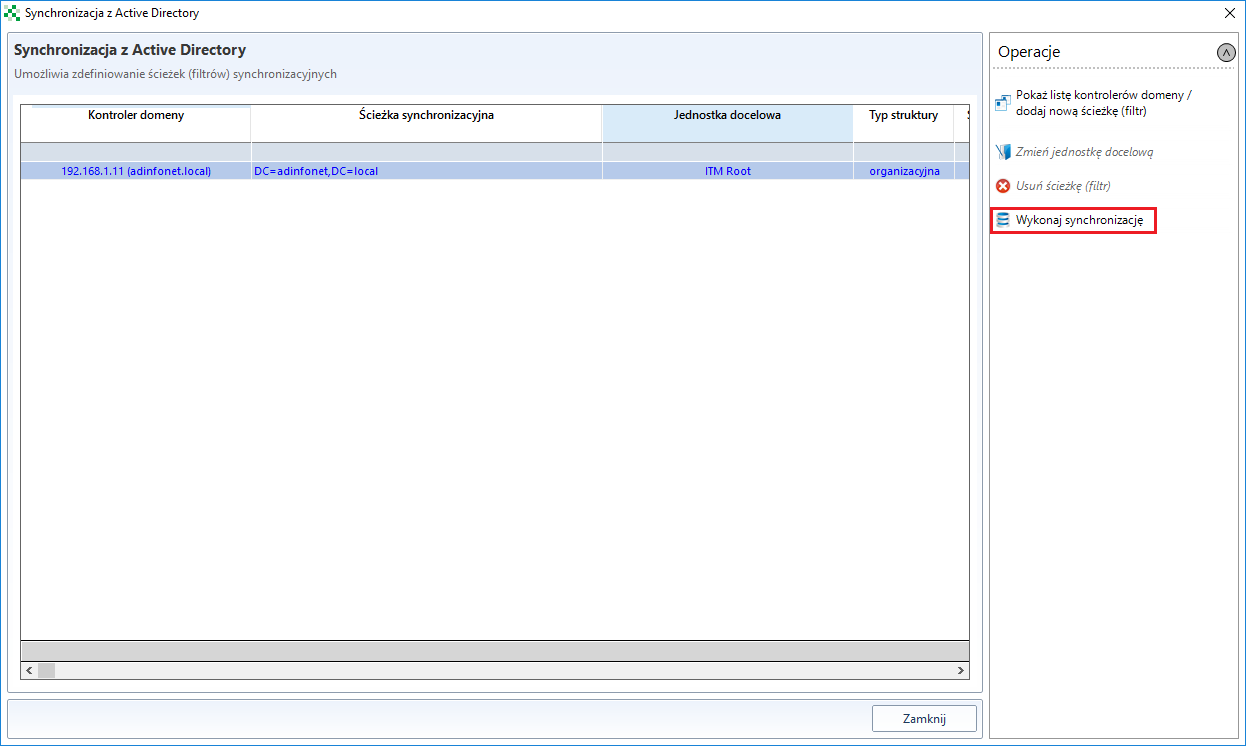
Setting Active Directory (AD) integration
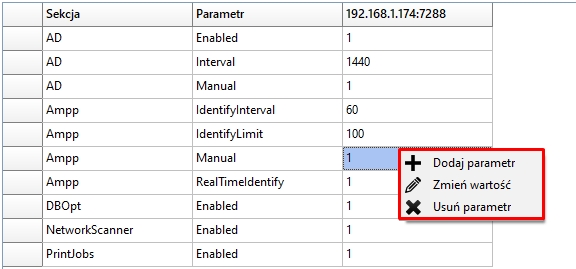
The type of synchronization is defined in the AD connection configuration window. Field Interval specifies how many minutes the synchronization will be performed (at the same time, check box Enabled) if the option Manual is selected, the synchronization will be performed manually by the user.
To perform manual synchronization, go to Tools->System Operations->Integration with Active Directory.

and in a new window, click Synchronize.
Options Debug Mode determine the type of logs and their details.
Software Identification (AMPP)

The configuration of the Ampp component allows to define (with the option RealTimeIdentify checked):
- IdentifyInterval - time interval defining what will be performed software identification,
- AuditInterval - time interval determining what will be done to audit the software.
- ## Network Scanner

This tab is used to start the module Network Scanner.
Database optimization (DbOpt)

To start database optimization, select Enabled, and you can also select ShrinkDatabase, which reduces the database size.
Scanning printer load (PrintJobs)

The options determine whether print supervision is enabled and what period of time the scan is carried out.
Global

Allows you to change the path for the Helix server upload directory.